Disassembling a trampoline can seem daunting, but it can be a breeze if you know the right steps. This article will show you how to disassemble a trampoline quickly and easily. So whether you’re moving house or want to give your trampoline some TLC, follow these simple steps, and you’ll be good to go!
Why is trampoline disassembly important?

Trampolines are great fun but can also be dangerous if not used or maintained properly. If you have small children, it’s particularly important to ensure that your trampoline is in good condition and that there are no sharp edges or other hazards that could cause injury.
In summers, it is necessary to disassemble the trampoline to avoid damage from severe weather conditions such as thunderstorms and high winds. The scorching summer heat can also cause the metal parts to expand and warp.
On the other hand, you need to disassemble the trampoline to prevent the frame and mat from freezing in winter. And simultaneously, the cold can cause the metal parts to contract and break. And the heavy snow let the trampoline frame stuck in the ground.
However, disassembling your trampoline occasionally also allows you to check for any wear and tear and make repairs as necessary. It will extend the life of your trampoline and ensure that it remains safe to use.
You can read the best review of trampolines indoors and the best trampoline for small yards.
What are the tools to disassemble a trampoline?
The first step in disassembling your trampoline is to gather the right tools. Trampoline disassembly is a time-taking and difficult process, but it is essential to do so to protect your investment.
Following are a few tools you will need to disassemble your trampoline safely and effectively:
A pair of Hand Gloves
You need a pair of gloves to protect your hands while disassembling the trampoline. There are many gloves in the market that you can choose from. But I recommend you double-coated work gloves that surely increase your efficiency in other mechanical work and gardening. Trampoline frames and springs are metal objects that can hurt your hands, so they are necessary to protect their safety measures.
A Trampoline spring tool
The spring removal tool is designed in a T-shape that helps you pull and remove the springs from the trampoline frame. It usually has a plastic grip handle with finger grooves and a metal hook.
The spring tool is helpful for both to take the spring-based trampolines apart and at the time of assembling the trampoline. It will make the spring installation a breeze. Another way to do this is to use a spare spring trampoline hook as a puller. And if you can try this, you will succeed in knowing how to take trampoline springs off without a tool.
A screwdriver
The screwdriver is needed to remove the screws that hold the legs of the trampoline and the netting on the poles in place. You will need to know the exact size of screws your trampolines have to get the specific-sized screwdriver. It will help you in the future to assemble the trampoline again. I recommend you Phillips head screwdriver here.
A wrench or pliers
The wrench or pliers can be used to loosen and remove the nuts and bolts that hold the trampoline’s frame together. It works as an alternative to an electric drill.
Electric Drill
Get an electric power drill for the bolts. It is also used for nuts. You will use the drill to ensure that all parts are taken off the trampoline.
How to disassemble a trampoline: Trampoline storage tips
- Trampoline users must ensure the area around the trampoline is clear of debris and objects that could get in the way or cause injury.
- Wear hand gloves to protect your hands from sharp edges.
- Check for any missing trampoline disassembly tool.
- Remove all loose items from the trampoline, such as shoes, clothing, toys, basketball hoop, etc.
- Before trampoline disassembly, check the steel frame, outer rings and all the springs for any rust because it is better to discard the rusty trampoline and get a brand new trampoline for kids.
- Also, keep your children out of the area while you begin the disassembly process. Read some more trampoline safety tips.
How to Dismantle a Trampoline: Step-by-Step Guide
Step: 1 Gathering tools to disassemble a trampoline
Before beginning with disassembling a trampoline, the first question that may come to your mind is what tools do I need to take down a trampoline? You need a basic tool kit that you usually get with the trampoline purchase. But, if you have lost any of them mentioned below, you must buy them to make the procedure uncomplicated.
Many parents rely on the instruction manuals before using a product which is a good resource. I recommend reading and following trampoline dissembling instructions before taking the first step.
Here is the list of the tools needed to take apart trampoline:
- Hand Gloves
- Trampoline spring puller
- Phillips head screwdriver
- Electric Drill
Step: 2 Clean the Trampoline before dissembling
Before taking the trampoline apart, it’s important to clean it well. This will make the process much easier and help extend the life of your trampoline. You can use a garden hose to wash the entire surface of the trampoline, paying special attention to areas that are particularly dirty or have build-up like the safety net. Once you’ve given it a good rinse, use a soft-bristled brush to scrub any remaining dirt. Let the trampoline dry completely before moving on to the next step.
After that, another essential thing is arranging the trampoline storage box. So, none of your trampoline parts may get lost. And will be stored in a dry and proper place.
Step: 3 Take apart the enclosure poles and trampoline safety net.
The next thing you’ll need to do to take apart a trampoline is to take out the net poles and safety net that surround the trampoline. It will give you access to the mat itself, which is what you’ll be disassembling next. To remove the poles, start unscrewing the clamps that hold them. Once the clamps are loose, you should be able to pull all the poles out of the frame.
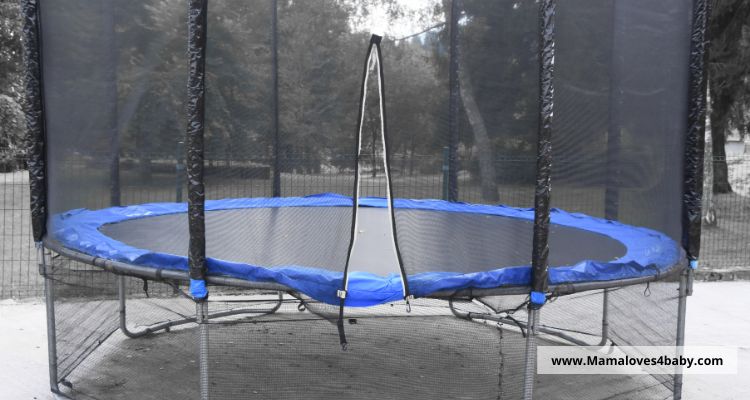
Be careful not to rip or tear the safety nets as you remove them
You will need to take a screwdriver and remove the screws holding the netting or untying the ropes that hold it in place. Once you have removed the screws, you can carefully pull the netting off the trampoline.
Related: How to Install netting on trampoline?
Step 4: Remove the safety Pad or safety cover
Once you have access to the trampoline mat, the next step is to remove the safety pads surrounding the trampoline ring. This padding is there for safety reasons and helps soften any falls onto the mat. It is usually held in place with Velcro or straps. Most trampoline pads are foam and can be easily removed by pulling them off the mat.
However, some models may have springs attached to the safety padding, so you’ll need to disassemble those as well to take apart a trampoline. Once the padding is removed, you will be able to see the spring system that helps to give the trampoline its bounce.
Step:5 How to remove trampoline springs: Dissembling Springs
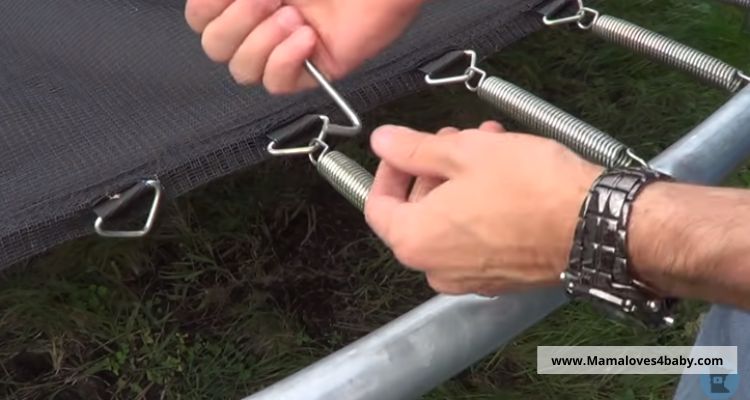
Removing the springs attached to the mat is the trickiest step in disassembling a trampoline. These springs provide the trampoline bounce and make it a fun activity. They can be tricky to remove if you don’t know what you’re doing. So, let’s learn how to remove trampoline springs.
Start by checking the condition of the springs. If they look rusty or damaged, it’s best to replace broken springs or rusty springs rather than try to remove and store them. However, if they’re in good condition, you can proceed with the removal.
Be careful when dissembling springs, as the springs can be quite sharp.
You’ll need a spring puller and hand gloves to remove the springs. This tool attaches to the end of each spring and helps release the tension on the springs so they can be removed safely. Start by attaching the spring puller to one end of the first spring. Once it’s securely in place, use the handle to twist the tool and release the tension on the spring hook.
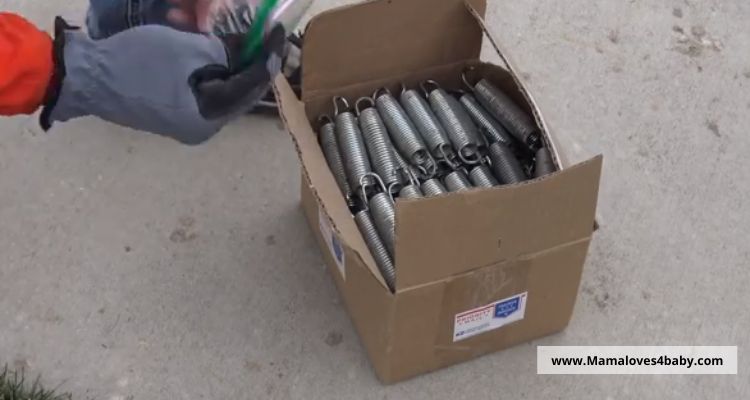
Repeat this process for all the trampoline springs, and then carefully remove them from the mat. With all the springs removed, your trampoline should now be completely disassembled and ready to be stored away.
Step: 6 Folding the trampoline mat
If you need to store the trampoline mat for any reason, it’s important to know how to fold it properly. It will help prevent damage to the mat and make it easier to transport. Start by folding the mat in half, lengthwise. Once it’s been folded in half, fold it in half again. Continue folding the mat until it’s small enough to fit inside a storage bag or container.
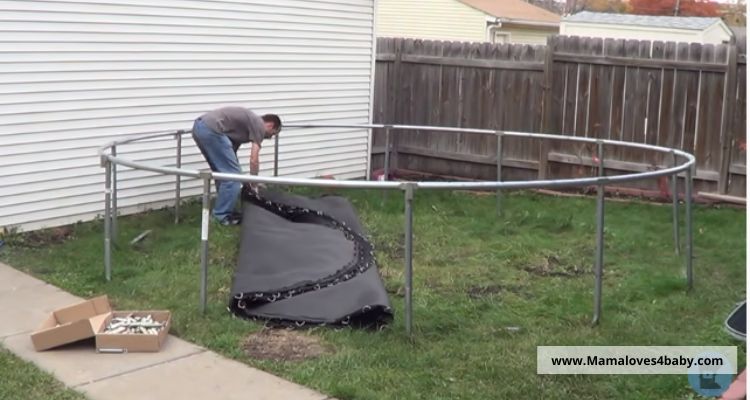
Step: 7 Securing the trampoline mat neatly
Once the trampoline mat is folded, you’ll need to secure it so it doesn’t unfold while in storage. The easiest way to do this is to wrap it in a heavy-duty tarp or piece of fabric. Ensure that the mat is completely covered, and then secure the tarp or fabric in place with rope or bungee cords.
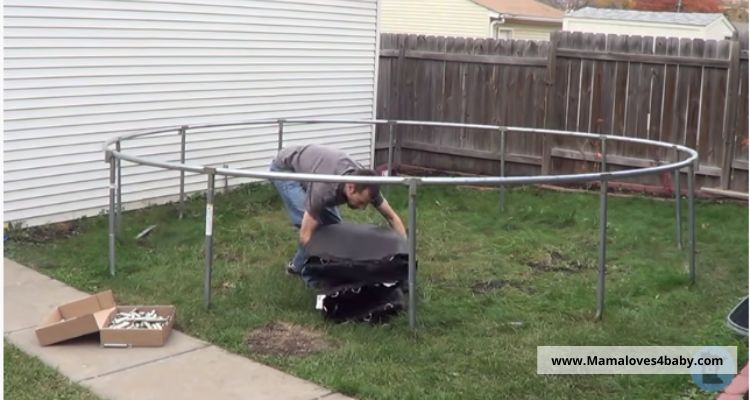
Step: 8 Dismantling and storing the trampoline frame
The final step is to store the trampoline frame. If you have enough space, the best way is to leave the frame assembled and lean it up against a wall or piece of furniture. However, if you need to save space, you can disassemble the frame and store the pieces separately. Just make sure that you label all of the pieces so that you’ll be able to put them back together.
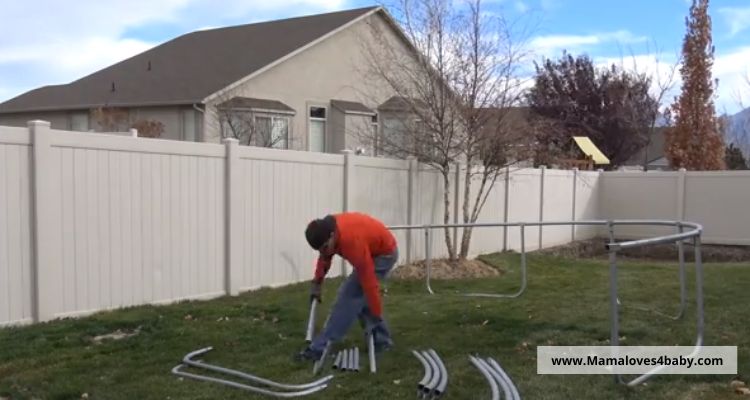
Start separating the metal frame if you need to save space by disassembling the trampoline frame. It is usually the biggest and heaviest part of the trampoline, so it’s best to disassemble it first. Also look for rusty trampoline frame. To do this, start by removing the bolts with the help of an eclectic power drill or wrench that holds the frame together. Once the bolts are removed, the frame should come apart easily. If it doesn’t light, you may need to use a hammer or other tool to tap it apart.
Step: 9 Disassembling the legs
Once the metal frame is dismantled, you can move on to the legs. Most trampoline legs are metal or plastic and can be dismantled by unscrewing them from the frame. However, some models may have legs that are welded to the frame, so you’ll need to use a saw or other tool to cut them off.
Step: 10 Storing the trampoline components
Once all trampoline parts are dismantled, you can begin storing them. The best way to do this is to put all the smaller pieces into a pre-determined trampoline storage container and then store the larger pieces separately.
Make sure to store all of the parts in a safe place and label everything so you’ll be able to put it back together when you’re ready to use the trampoline again. It is usually the best way to transport a trampoline.
And always follow the manufacturer’s instructions when assembling or disassembling trampoline. Thanks for reading
Conclusion
Now that you have learned how to disassemble a trampoline like a pro, it’s time for spring cleaning! Follow the above steps, and your backyard will be ready for summer. Happy bouncing!
How Long Does it Take to Disassemble a Trampoline?
It usually takes around 30 minutes to an hour to disassemble a trampoline. However, this may vary depending on the size and type of trampoline and how much experience you have in disassembling them.
If you need to take apart a trampoline, it’s important to have the right tools for the job. These tools will help make the process go smoothly and help to prevent any damage to the trampoline.
How Difficult is it to Disassemble a Trampoline?
The difficulty of disassembling a trampoline will depend on your type of trampoline. If you have a small, round trampoline, it will be easier to disassemble than a large, rectangular one. However, most trampolines can be easily disassembled with trampoline springs without a tool.
How to move a trampoline?
If you need to move a trampoline by yourself, the first thing you’ll need to do is remove the netting and padding. Once those are removed, you can disassemble the trampoline frame. Start by removing the screws that hold the frame together, and then carefully take it apart.
With the frame disassembled, you can then proceed to remove the springs. To do this, you’ll need a spring puller tool. Once the springs are removed, you can fold the trampoline mat and store it away.
Parents Also Ask
How long does it take to put a trampoline together?
It takes about an hour to put a trampoline together, depending on its size. You will need the following tools: a hammer, spring tool, screwdriver, drill, and saw.
You can probably get away with a small trampoline with just a rubber mallet and screwdriver if you have a small trampoline. Larger trampolines will require the use of a drill and saw.
What is the best way to put trampoline springs on?
The best way to attach the trampoline spring hook is by using a come-along or a spring tool. It is a tool that attaches to the trampoline frame and pulls the strings tight. You can usually find come-along or spring pullers at hardware stores.
Are trampolines easy to assemble?
Trampolines are not difficult to assemble, but they can be time-consuming. It is important to take time and ensure that all parts are properly secured before using the trampoline. If you are unsure about assembling your trampoline, many helpful videos online can walk you through the process step-by-step. Most trampolines come with all the necessary tools for assembly, but you may need to purchase a come-along or spring tool if you do not have spring-less trampolines.
Can you move a trampoline without taking it apart?
Yes, you can move a trampoline without taking it apart, but it is much easier to move a trampoline if you disassemble it first.
If you need to move an already assembled trampoline, you will need to recruit some help. Try to find at least a few friends who can lift the trampoline and carry it to its new location.
It is also good to have someone hold the trampoline in place while moving it, just in case it starts to tip over.
What is the best way to haul a trampoline?
The best way to haul a trampoline is by using a dolly. It will help distribute the trampoline’s weight and make it easier to move.
You can try using a wheelbarrow if you do not have a dolly. However, this will be more difficult, and you may need to enlist the help of additional people.
In general, it is best to disassemble the trampoline before attempting to move it. It will make the process much easier and prevent damage to the trampoline.

